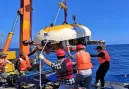
Dutch Uboat - Worx Submersibles
Share:
The electric outboard motor serves as the power core of a vessel, and its proper assembly is of utmost importance.
This guide provides a detailed, step-by-step introduction to every crucial stage of assembly, safety checks and commissioning procedures. By following these instructions, vessel owners, integrators and marine technicians can complete the installation smoothly and embark on their aquatic journey with confidence.
Dutch U-Boat Worx integrates electric outboard propulsion across a range of small submersibles and surface craft. Their programs require reliable, efficient electric drive systems that are easy to install, safe to commission, and compatible with varied onboard battery architectures.
This page documents a structured, SEO-friendly assembly and commissioning guide tailored to vessel integrators, marine technicians and boat owners.
Power Matching – Different vessel types have varying requirements for power and torque. Small fishing boats typically need only low-power motors, while large yachts require high-performance systems.
Battery System Compatibility – Voltage, capacity and discharge rate must match the motor to avoid poor performance or damage.
Installation Reliability – Incorrect flange alignment, improper torque or inferior seals can cause failures.
Electrical & Mechanical Safety – Risks such as short circuits, water ingress and propeller misalignment must be minimized.
Repeatable Commissioning – Standardized tests ensure predictable on-water performance.

Consult the vessel’s user manual or manufacturer to select the appropriate outboard motor model.
Small fishing boats (3–4 m) generally match motors of 3–6 HP equivalent.
Recreational yachts (5–6 m) may require 10–20 HP motors.
Correct power matching avoids over- or under-specification and ensures sufficient propulsion.
Since electric outboard motors are powered by batteries, compatibility is critical.
Confirm battery voltage, capacity and discharge rate.
Common systems are 12V, 24V or 48V.
If the motor requires 48V but the vessel has 24V, plan for a battery upgrade or series configuration.
Essential tools: wrenches, screwdrivers, pliers, and a torque wrench to achieve specified torque values.
Accessories: purchase brackets, couplings and gaskets compatible with the motor.
Inferior or mismatched accessories can cause instability, water leakage or shortened service life.
Power Disconnection: Always disconnect the battery or master switch before starting work to avoid electric shock.
Protective Equipment: Wear gloves and safety goggles to protect hands and eyes during handling and installation.
Before disassembly, carefully observe and record the connection positions of wires, fuel pipes (if any) and control cables.
Take photos or draw a simple diagram.
Note the correspondence between wire colors and connection ports.
Follow the principle of “easy to difficult” and gradually remove bolts and nuts.
Use appropriate tools (e.g., socket wrenches).
Loosen bolts in a diagonal sequence to avoid uneven force.
Support the motor to prevent sudden falls.
For heavier motors, use two-person handling for safety.
Place the new outboard motor in the predetermined position and ensure the installation holes align precisely.
Use gaskets and bolts to firmly secure the motor.
Tighten bolts according to the specified torque value:
Small units: 10–20 N·m
Larger units: 30–50 N·m (refer to your motor’s manual).
Follow a diagonal tightening sequence to distribute stress evenly.
Wire Connections: Connect wires in the recorded sequence. Clean oxide layers with sandpaper, apply conductive paste if specified, and insulate joints using heat-shrink tubing or marine-grade tape.
Control Cables: Connect throttle and steering cables securely and ensure smooth actuation without twists or kinks.
Additional Accessories: Install couplings and gaskets accurately. Check fuel pipe connections (if present) with soapy water to ensure no leaks.
Line Recheck: Ensure all connections are correct, tight and undamaged.
Battery Check: Fully charge the battery and test voltage and capacity with a professional tester to confirm stable output.
Run the motor briefly (1–2 minutes) while the vessel is not in the water.
Observe for smooth operation and absence of abnormal noise or vibration.
Check that throttle and steering respond correctly.
Stop immediately if sharp friction or knocking sounds occur.
After a successful no-load test, launch the vessel and gradually test at low to high speeds.
Observe speed, acceleration and steering performance.
At low speeds, the vessel should navigate stably without shaking.
At high speeds, it should maintain a straight course with easy steering.
Troubleshoot any vibration, steering issues or unusual current spikes.
Always disconnect the battery during assembly to eliminate shock risk.
Wear gloves and eye protection when working with mechanical or electrical parts.
Use marine-grade gaskets and properly rated cable penetrators to prevent water ingress.
Maintain pre- and post-installation checklists and photo records for warranty and traceability.
Predictable Vessel Performance: Optimized thrust, smooth handling and consistent endurance.
Reduced Field Failures: Correct mounting, sealing and electrical protection lower maintenance costs.
Enhanced Safety: Standardized safety checks minimize electrical or mechanical faults.
Faster Integration: Modular kits and clear interface specifications shorten time-to-water.
Standardize motor-to-hull interface kits for quick replacements across small craft and submersibles.
Provide battery compatibility matrices and BMS integration guides to prevent mismatches.
Ship torque and wiring diagrams with each motor and offer downloadable commissioning checklists.
Use structured “pre-flight” checklists with photos and sign-off for serviceability and compliance.
Haoye partners with shipyards, submersible OEMs, marine integrators, research institutions and offshore operators to supply marine-grade electric outboard systems, integration kits and commissioning support.
Contact Haoye today for tailored propulsion packages, BMS integration services and on-site commissioning to get your vessel safely and quickly into operational service.
The electric outboard motor serves as the power core of a vessel, and its proper assembly is of utmost importance. The following will provide you with a detailed introduction to every crucial step in the assembly of an electric outboard motor, enabling you to complete the assembly smoothly and embark on your aquatic journey.

Pre - assembly Preparations
Confirm Vessel Compatibility
Different vessel types have varying requirements for the power and torque of electric outboard motors. Small fishing boats typically only require low - power outboard motors, while large yachts need high - power and high - performance outboard motors to provide sufficient propulsion. Therefore, it is essential to consult the vessel's user manual or the manufacturer to determine the suitable model of the outboard motor. For instance, a small fishing boat with a length of 3 - 4 meters is usually appropriately equipped with an electric outboard motor with a power of 3 - 6 horsepower; a 5 - 6 - meter - long recreational yacht may require an outboard motor with a power of 10 - 20 horsepower.
Check Battery Compatibility
Since electric outboard motors are powered by batteries, ensuring that the selected outboard motor is compatible with the existing battery system is of critical importance. Parameters such as battery voltage, capacity, and discharge rate need to be carefully considered. If the outboard motor requires a 48V power supply system, but the existing battery pack is 24V, a direct match is not possible. In such cases, the battery needs to be replaced or the battery connection method adjusted. For example, common electric outboard motors are mostly compatible with 12V, 24V, or 48V battery systems, which must be clearly confirmed before assembly.
Prepare Tools and Accessories
Tool Preparation: Essential tools such as wrenches, screwdrivers, and pliers are indispensable. A torque wrench may also be required, as it can ensure that fixing components such as bolts and nuts reach the specified torque value during installation, guaranteeing a secure and reliable installation. Wrenches of different specifications are used for disassembling and installing bolts of various sizes, screwdrivers are used for disassembling and installing screws, and pliers can be used to pick up small parts or provide auxiliary fixing.
Accessory Purchase: Purchase installation accessories that are compatible with the new outboard motor, such as brackets, couplings, and gaskets. Inferior or mismatched accessories may lead to unstable installation, water leakage, and other issues, affecting the normal operation and service life of the outboard motor. For example, if the gasket is of poor quality, water may seep into the interior of the outboard motor and damage key components such as the motor.
Safety Precautions
Power Disconnection Operation: Before starting the assembly, be sure to disconnect the battery connection to prevent electric shock accidents during the operation. This can be achieved by unplugging the battery plug or turning off the battery master switch. Even if the battery appears to have a low charge, do not take it lightly, as sudden high - current situations may occur due to circuit short - circuits during the assembly process.
Wear Protective Equipment: Wear personal protective equipment, such as gloves and safety goggles, to avoid injuries during handling and installation. Gloves can protect your hands from scratches caused by parts, and safety goggles can prevent part debris from splashing into your eyes during the disassembly or installation process.
Remove the Old Outboard Motor (if applicable)
Record the Connection Method
Before removing the old outboard motor, carefully observe and record the connection methods of all components, including the connection positions and sequences of wires, fuel pipes (if any), control cables, etc., to ensure correct connection during the installation of the new outboard motor. You can take photos with your mobile phone for reference or draw a simple connection diagram. For example, record the correspondence between the wire colors and the connection ports, as well as the routing and connection positions of the fuel pipes.
Dismantle with Care
Follow the principle of "from easy to difficult" and gradually remove the bolts, nuts, and other components that fix the old outboard motor. During the disassembly process, pay attention to supporting the outboard motor to prevent it from falling suddenly and causing damage or injury. Use appropriate tools, such as socket wrenches, and gradually loosen the bolts in a diagonal sequence to avoid the outboard motor tilting and falling due to uneven force. When removing a heavier outboard motor, it is advisable to have two people work together, with one person responsible for disassembly and the other for stabilizing the outboard motor.

Install the New Electric Outboard Motor
Correct Positioning
Place the new outboard motor in the predetermined position to ensure that the installation holes of the bracket are precisely aligned with those on the vessel. Use gaskets and bolts to firmly fix the outboard motor to the vessel, and tighten the bolts according to the specified torque value to prevent the outboard motor from loosening during operation. Generally, the installation bolt torque value for small outboard motors is 10 - 20 N·m, and for large outboard motors, it may require 30 - 50 N·m. The specific value should be referred to in the installation instructions of the outboard motor. When tightening the bolts, also follow the diagonal sequence to gradually tighten them, ensuring that the outboard motor is evenly stressed.
Connect Wires and Accessories
Connect Wires: Connect the wires in sequence according to the previously recorded connection method, ensuring that the wire connections are firm and well - insulated to avoid short - circuits or open - circuits. Before connecting the wires, clean the oxide layer at the wire joints. You can gently sand them with sandpaper and then apply an appropriate amount of conductive paste before making the connection. After the connection is completed, use insulating tape or heat - shrinkable tubing to insulate the wire joints.
Connect Control Cables: Connect the control cables to the corresponding control devices, ensuring a tight connection and flexible operation. Control cables usually include throttle control cables, steering control cables, etc. Ensure that the control cables are not twisted or knotted during installation to avoid affecting the operating performance. For example, the throttle control cable should be able to be pulled smoothly to control the opening and closing of the throttle.
Install Other Accessories: Install other accessories such as couplings and gaskets. The coupling should be installed accurately to ensure smooth power transmission; the gasket should be installed in place to prevent water leakage. For outboard motors with fuel pipe connections (such as some fuel - electric hybrid outboard motors), ensure that the fuel pipes are tightly connected and there are no leaks. After installation, you can apply soapy water to the fuel pipe connection points and observe for any bubbles to check for leaks.

Post - assembly Debugging Work
Electrical Inspection
Line Recheck: Recheck whether all wire connections are correct, firm, and whether the insulation layer is damaged. Carefully examine the connection points of each wire to ensure that there are no signs of looseness and that the insulation layer is not scratched or worn.
Battery Charging and Detection: Before starting the outboard motor, fully charge the battery and check the battery's power and performance. Use a professional battery tester to detect parameters such as battery voltage and capacity to ensure that the battery can provide a stable power output for the outboard motor. If the battery power is insufficient or the performance is poor, it may cause the outboard motor to fail to start normally or operate unstably.
No - load Test
Start the outboard motor for a short time for a no - load test when the vessel is not in the water. Observe whether the operation of the outboard motor is stable and whether there are any abnormal noises or vibrations. Check whether the control device is flexible and can normally control the speed and steering of the outboard motor. The start - up time should not be too long, generally controlled within 1 - 2 minutes to avoid damaging the motor. During the test, pay attention to the sound of the outboard motor during operation. Under normal circumstances, it should be a smooth and continuous running sound. If a sharp friction sound or abnormal knocking sound occurs, stop the test immediately and check for problems.
Load Test
After the no - load test is normal, launch the vessel for a load test. Run the outboard motor at different speeds and observe the vessel's navigation performance, such as speed, acceleration performance, and steering performance. Gradually increase the speed from low to high and feel whether the vessel accelerates smoothly and steers sensitively. For example, at low speeds, the vessel should be able to navigate stably without obvious shaking; at high speeds, the vessel should be able to maintain a straight course, and the steering operation should be easy and smooth. If the vessel's navigation is abnormal during the load test, timely troubleshoot the problems. Possible causes may include improper installation of the outboard motor, propeller failure, or insufficient battery power.
Through the above - mentioned detailed assembly steps and debugging methods, you can successfully complete the assembly of the electric outboard motor, enabling your vessel to navigate safely and efficiently on the water. If you encounter any problems during the assembly and use process, it is recommended to consult the outboard motor's user manual or a professional in a timely manner.
Latest News
Underwater Propulsion: Empowering the Blue Civilization
13 Aug., 2025
Underwater Propulsion: The Master Key to the Deep Blue
08 Aug., 2025
The "Invisible Engine" Driving Ocean Exploration
23 Jul., 2025
Deep-Sea Propulsion: A Silent Technological Breakthrough
11 Jul., 2025
The Wave of Underwater Propulsion Technology Development
03 Jul., 2025
The Intelligent Revolution of Deep-Sea Thrusters: From "Working with Faults" to "Proactive Health"
27 Jun., 2025
Underwater Thrusters: Deep-Sea Engines Driving Multidisciplinary Exploration and Development
24 Jun., 2025
Related Products

IB 3kW Inboard

IB 12kW Inboard

Rated Voltage/Current: 96V / / 208 A
Input Voltage Range: 67.2V ~ 120.4VDC
Thrust: 230Kg
Net Weight: ≯50Kg
Communication: CAN

Rated Voltage/Current: A96V / 83 A
Input Voltage Range: 67.2V ~ 120.4VDC
Thrust: 100Kg
Net Weight: ≯22Kg
Communication: CAN

Rated Voltage/Current:48V / 42 A
Input Voltage Range: 35 V ~ 60VDC
Thrust: 30Kg
Net Weight: ≯6.2kg
Communication: CAN

Rated Voltage/Current:96V / 125Ah
Input Voltage Range:82V - 108VDC
Rated Power:12KW

Rated Voltage/Current:72V / 41Ah
Input Voltage Range:55V - 90VDC
Rated Power:3KW

Rated torque: 23 Nm
Rated speed: 3000 rpm
Rated voltage: 600 VDC

Power: 2kW
Forward Thrust: 20kg
Backward Thrust: 20kg

Power: 700W
Thrust(Forward/Backward): 8kg/8kg
Rated speed: 2960r/min

Power: 6.5 kW
Forward Thrust: 95kg
Backward Thrust: 95 kg
CONTACT US NOW
A Better User Experience
We coopetate with a group of world-class scientific research practitioners, and delivered thousands of units, including Underwater thrusters, electric outboard, rotary actuators, and other products to our customers.
Many knowledgeable and realistic customers have given us a lot of recognition and support, which makes us more firm in the spirit of perfectionist craftsmanship, taking the boundaries of technology as our boundaries, and making unremitting efforts to pursue a better user experience.